 Today is Day 6 of the Dirty Diaper Laundry's Flats & Handwashing Challenge. (For info about the challenge, you can view Dirty Diaper Laundry's site, my blog post about my preparation, Day 1, Day 2, Day 3, Day 4, & Day 5.)
This morning, I admired the dry pile of flats and cover that were hung dry yesterday. I inventoried the diaper bag and noticed there are no spare diaper covers left except for the one clean Flip.
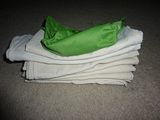
Padfolded flats and Flip diaper cover
I'm not sure where the Swaddlebees cover is and I knew that two covers were dirty. I decided to quickly handwash El's covers upon her waking and washed the other two covers to hang dry. They take about a minute each to wash and I don't even bother with using cloth diaper-friendly soap and opt for whatever is nearby. I've used dish soap and hand soap. Hopefully, they'll be dry in a few hours before we leave the house today.
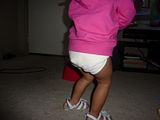
One great way to prevent diaper rash is for a baby/toddler to spend some time each day bottomless or in a natural fiber diaper with no cover to "air out," especially when the weather warms up. Since I'm trying to spare covers as much as possible this morning, that's what we've been doing!
Down the stairs, bottomless
As much as I love padfolding flats into cover, there are times where I do find it nostalgically enjoyable to fold up flats in the various traditional folds.
Here's a picture tutorial of the Neat Fold, modified:
Step 2: Fold up bottom corner towards middle.
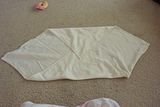
Step 4: Take left corner and fold across so that top edge of "flap" aligns across top of folded section.

This is what the flat should look like.

Step 5: Repeat step 4 with the right side. This is actually the end of the steps needed to make the traditional Neat Fold but I'm not a big fan of how bulky the middle is and prefer a thinner crotch area.

Step 6: Fold in left side towards middle.
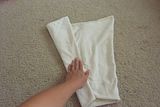
Step 7: Fold in right side towards middle.
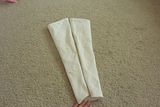
Step 8: Pull out left corner.
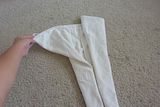
Step 9: Pull out right corner. (Notice the great "poop pocket" this creates.)
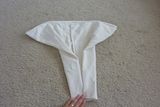
Step 10: Lay baby on top of diaper and pull center panel up.
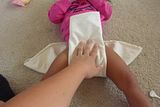
Step 11: Fold down rise, if needed.
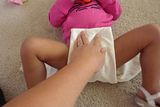
Step 12: Pull up right corner and "roll in" to make for a trimmer fit across hip, if desired. (This will create more of a "bikini cut" rather than a "boy short" cut.) Pull "tab" across middle.
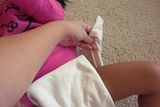
Step 13: Repeat step 12 for left side.
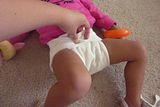
Step 14: Adhere snappi fastener. Done!
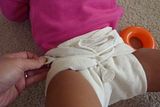

I like to check each side for any gaping and will roll in any loose edges.
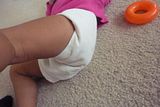
Notice the nice tight fit.
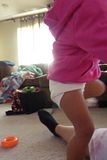
A very trim fluffy bum!
Back side, showing the "poop pocket."

Trim fit through the crotch.

Another front view.
I know this sounds like a lot of steps. This is one of the more involved folds, especially since I've modified it. But it fits soooo well, distributes the layers in all the areas El needs, and still takes less than a minute from start to finish. Another great thing about being able to keep her coverless is that we'll immediately know if she's wet and change her right away, something we're trying to do as we embark in official potty training once school gets out this summer.
My most favorite reason for going coverless is easier clean up after meals!
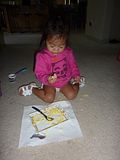
El's fave breakfast: scrambled eggs
Here's a picture tutorial of the Neat Fold, modified:
Step 1: Lay out flat diaper with point down. (El never fails to jump on any laid out fabric!)
Step 2: Fold up bottom corner towards middle.

Step 4: Take left corner and fold across so that top edge of "flap" aligns across top of folded section.

This is what the flat should look like.

Step 5: Repeat step 4 with the right side. This is actually the end of the steps needed to make the traditional Neat Fold but I'm not a big fan of how bulky the middle is and prefer a thinner crotch area.

Step 6: Fold in left side towards middle.

Step 7: Fold in right side towards middle.

Step 8: Pull out left corner.

Step 9: Pull out right corner. (Notice the great "poop pocket" this creates.)

Step 10: Lay baby on top of diaper and pull center panel up.

Step 11: Fold down rise, if needed.

Step 12: Pull up right corner and "roll in" to make for a trimmer fit across hip, if desired. (This will create more of a "bikini cut" rather than a "boy short" cut.) Pull "tab" across middle.

Step 13: Repeat step 12 for left side.

Step 14: Adhere snappi fastener. Done!


I like to check each side for any gaping and will roll in any loose edges.

Notice the nice tight fit.

A very trim fluffy bum!

Back side, showing the "poop pocket."

Trim fit through the crotch.

Another front view.
I know this sounds like a lot of steps. This is one of the more involved folds, especially since I've modified it. But it fits soooo well, distributes the layers in all the areas El needs, and still takes less than a minute from start to finish. Another great thing about being able to keep her coverless is that we'll immediately know if she's wet and change her right away, something we're trying to do as we embark in official potty training once school gets out this summer.
My most favorite reason for going coverless is easier clean up after meals!

El's fave breakfast: scrambled eggs
Check out other participants' blogs!


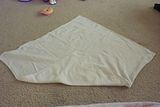
Which type of flat are you using in these photos? They look huge! Just what I'm looking for. :) great tutorial!
ReplyDeletehttp://www.pawshoovesdiapers.blogspot.com
@Adele, I'm pretty sure these are the Green Mountain Diaper unbleached large prefolds. They are FANTASTIC! I have also heard great things about the Diaper Rite Large's at diaperjunction.com.
ReplyDelete